A second viewing checklist is a structured list of items to inspect when you revisit a property you are serious about buying. It helps you move beyond an initial emotional reaction to objectively assess the home’s practical condition, structural integrity, and long-term livability. This detailed inspection is crucial for uncovering potential issues, from dampness and cracks to neighborhood noise, that might have been missed during a faster first tour, helping you avoid costly future repairs.
Key Benefits at a Glance
- Spot Hidden Problems: Uncover costly issues like damp, pests, cracks, or faulty electrics that are not obvious on a first visit.
- Make an Objective Decision: Move past the initial “wow factor” and evaluate the property based on facts, functionality, and practical needs.
- Strengthen Your Bargaining Position: Identify necessary repairs that can be used to negotiate a lower purchase price or request fixes from the seller.
- Assess the Neighborhood: Check for traffic noise, parking availability, and the general atmosphere at a different time of day or day of the week.
- Gain Confidence in Your Offer: Feel more secure about making a significant financial commitment by confirming the home truly meets your standards.
Purpose of this guide
This guide is for prospective homebuyers who have already had a first viewing and are preparing for a second, more detailed inspection. The purpose is to help you systematically evaluate a property so you do not miss critical details that could impact your finances and quality of life. You will learn what to look for room by room, crucial questions to ask the estate agent, and how to assess the property’s exterior and surroundings, ensuring you can make a confident and well-informed purchasing decision.
Introduction
A second viewing transforms casual property browsing into professional-grade assessment, serving as your final opportunity to evaluate a potential home with analytical precision rather than emotional impulse. This comprehensive checklist, developed using industry-standard methodologies from building inspection professionals, provides the systematic framework needed to protect yourself from costly mistakes that could impact your investment for years to come.
The difference between a successful property purchase and a regrettable one often lies in the thoroughness of your second viewing. While first impressions focus on aesthetics and general appeal, your second visit must shift to practical evaluation of structural integrity, utility functionality, and long-term livability. Professional surveyors and home inspectors follow rigorous protocols to assess properties objectively, and this checklist adapts their expertise for homebuyers who need to make informed decisions within the constraints of a standard viewing appointment.
Statistics from the real estate industry consistently demonstrate that buyers who conduct thorough second viewings are significantly more likely to negotiate favorable terms, avoid unexpected repair costs, and maintain satisfaction with their purchase long-term. This systematic approach ensures you evaluate every critical aspect of the property and surrounding area before committing to what is likely your largest financial investment.
Why a second viewing matters
The psychological transition from your first to second viewing represents a fundamental shift in assessment methodology that directly impacts your real estate transaction success. During initial viewings, buyers typically experience emotional responses driven by staging, decoration, and general impressions, while second viewings should focus on analytical evaluation of structural condition, functionality, and practical living considerations.
“Typically, people view a house between two and four times before they buy.”
— GetAgent, May 2022
Source link
Research indicates that over 60% of homebuyers change their initial property assessment after conducting a thorough second viewing, with many identifying deal-breaking issues or gaining confidence to proceed with their purchase. The first viewing typically lasts 15-20 minutes and focuses on spatial layout and aesthetic appeal, while effective second viewings require 45-60 minutes of systematic examination covering structural elements, utility systems, and neighborhood characteristics.
| First Viewing | Second Viewing |
|---|---|
| Emotional response | Analytical assessment |
| General impressions | Detailed inspection |
| Focus on aesthetics | Focus on functionality |
| Quick walkthrough | Systematic examination |
| Surface-level observations | Deep structural review |
Professional property valuers emphasize that second viewings reveal issues invisible during initial visits, particularly problems masked by staging, lighting conditions, or limited time pressure. The objective evaluation framework used during second viewings helps distinguish between cosmetic concerns that can be easily addressed and fundamental structural problems that require significant investment or should prevent purchase entirely.
For initial viewing reference our property viewing checklist to compare what you should check on first versus second visit.
How to prepare for your second viewing
Professional surveyors approach property assessments with systematic preparation that ensures no critical elements are overlooked during their evaluation. Your preparation should mirror this methodology, combining documentation review, tool gathering, and strategic planning to maximize the effectiveness of your limited viewing time.
Begin by thoroughly reviewing all materials from your first viewing, including photographs, notes, and any concerns you identified initially. This review process helps focus your attention on specific areas requiring detailed examination while ensuring you don't miss important details due to the excitement or pressure of a second viewing appointment.
- Review first viewing notes and photos
- Gather measuring tape, flashlight, and notepad
- Download property documents and floor plans
- Research comparable sales in the area
- Prepare specific questions based on initial concerns
- Schedule adequate time (minimum 45 minutes)
- Bring a trusted second opinion if possible
Research the property's history through public records, including previous sale prices, planning applications, and any building work that has been completed. This information provides context for your physical inspection and helps identify areas that may require particular attention during your viewing.
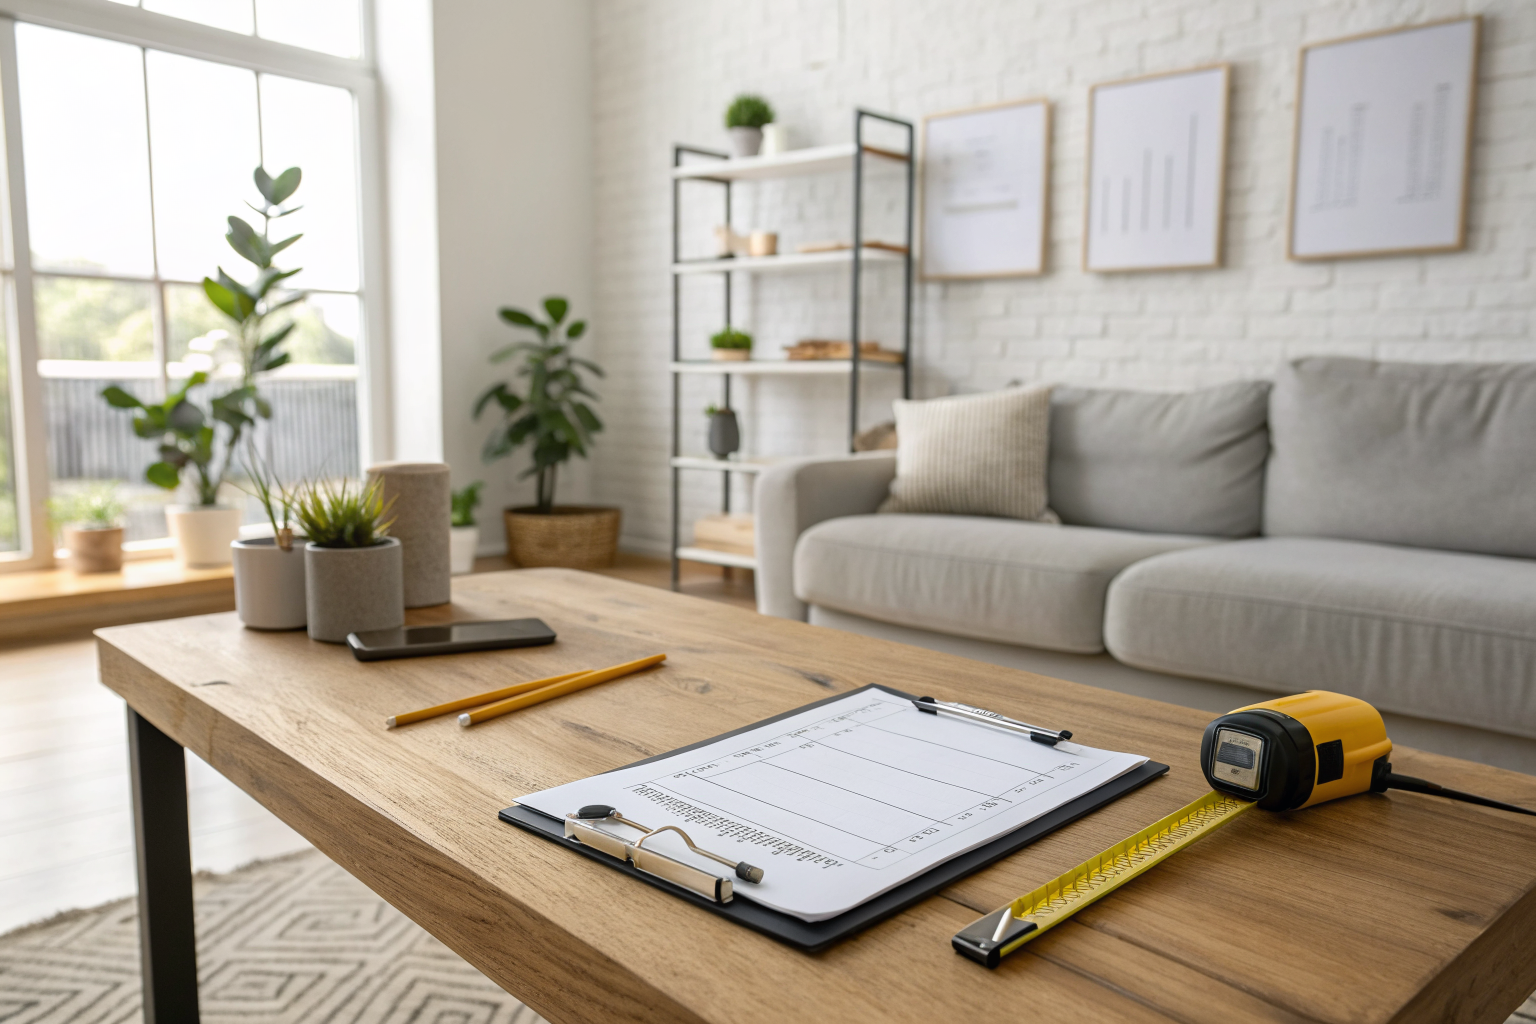
Essential tools for your second viewing include a measuring tape for room dimensions and furniture planning, a flashlight for examining dark areas like lofts or basements, and a notepad for recording observations systematically. Some buyers also bring a moisture meter for checking damp issues, though this requires permission from the current owners.
Track all tasks systematically by using our moving house checklist pdf for comprehensive task tracking during your property search.
Timing your second viewing strategically
Professional property assessors understand that different times reveal various characteristics of both the building and surrounding area that significantly impact livability and long-term satisfaction. Strategic timing allows you to evaluate factors invisible during single-time visits, particularly those related to noise levels, natural lighting, traffic patterns, and neighborhood dynamics.
“A typical house viewing lasts around 30 minutes so you should have long enough to cover your checklist of what to look for when viewing a house.”
— HomeOwners Alliance, 2026
Source link
| Time of Day | What to Look For | Why It Matters |
|---|---|---|
| Morning (8-10am) | Natural light, traffic patterns, noise levels | Reveals daily commute impact and light quality |
| Afternoon (2-4pm) | Sun position, heating efficiency, neighborhood activity | Shows energy costs and community dynamics |
| Evening (5-7pm) | Artificial lighting needs, parking availability, security | Indicates practical living conditions |
| Weekend | Neighborhood character, noise from neighbors, local amenities | Shows true residential environment |
Weather conditions also significantly impact your assessment, with rainy days revealing drainage issues, gutter problems, and potential flooding risks that remain hidden during dry weather. Similarly, winter viewings expose heating efficiency and insulation quality, while summer appointments help evaluate cooling needs and garden maintenance requirements.
Consider scheduling your second viewing at a different time than your first to gain comprehensive understanding of the property's characteristics throughout various conditions. This approach mirrors professional survey methodology and provides the complete picture necessary for informed decision-making.
The exterior assessment
Systematic exterior evaluation forms the foundation of professional building assessment, incorporating structural engineering principles into visual inspection processes that reveal critical issues affecting both safety and long-term maintenance costs. Your exterior assessment should follow the same methodical approach used by qualified surveyors, examining each element systematically rather than relying on general impressions.
- Walk the full perimeter of the property
- Examine roof condition from ground level
- Check foundation for cracks or settling
- Inspect exterior walls for damage or repairs
- Test all external doors and windows
- Evaluate drainage and guttering systems
- Assess driveway and pathway conditions
Begin your exterior assessment by walking completely around the property to gain perspective on its condition from all angles. Many structural issues are only visible from specific viewpoints, and this comprehensive approach ensures you don't miss critical problems that could result in significant repair costs after purchase.
Professional building inspectors emphasize that exterior condition often indicates overall property maintenance standards and can predict the likelihood of interior problems. Well-maintained exteriors typically correlate with systematic upkeep throughout the property, while exterior neglect frequently signals broader maintenance issues requiring investigation.
Structural elements to examine
Building inspection industry standards provide specific criteria for evaluating critical structural components that support the property's integrity and determine major repair requirements. Foundation assessment focuses on identifying settlement, water damage, and structural movement that could indicate serious underlying problems requiring professional structural engineering consultation.
| Structural Element | What to Check For | Warning Signs |
|---|---|---|
| Foundation | Cracks, settling, water damage | Large cracks, bowing walls, water stains |
| Roof | Missing tiles, sagging, gutter condition | Daylight through roof, water damage, moss growth |
| External walls | Cracks, pointing condition, damp patches | Bulging bricks, crumbling mortar, green staining |
| Windows | Frame condition, seal integrity, operation | Rot, condensation between panes, difficulty opening |
Roof condition assessment requires careful examination from ground level, looking for missing or damaged tiles, sagging sections, and gutter problems that indicate water management issues. Professional surveyors estimate that roof replacement costs average £5,000-£15,000 depending on property size and materials, making thorough roof evaluation essential during your viewing.
Foundation inspection focuses on identifying cracks wider than 5mm, which may indicate settlement or structural movement requiring professional assessment. Pay particular attention to step cracks in brickwork, horizontal cracks in foundation walls, and any signs of recent repair work that might indicate ongoing structural problems.
Window and door assessment should include testing operation, checking seal integrity, and examining frame condition for rot or deterioration. Double-glazing failures, indicated by condensation between glass panes, typically cost £200-£800 per window to repair and may indicate systematic seal failures throughout the property.
Boundary lines and external features
Survey information verification against physical land features prevents potential boundary disputes and ensures you understand exactly what you're purchasing. Property line accuracy affects not only legal ownership but also future development potential, maintenance responsibilities, and neighborly relationships that impact long-term satisfaction with your purchase.
- Compare fence lines with property deeds
- Check for encroachments from neighboring properties
- Verify garden boundaries match legal descriptions
- Inspect shared walls and responsibility agreements
- Examine access rights and easements
- Assess condition of boundary markers
- Note any disputed or unclear boundary areas
Fence condition assessment should consider both structural integrity and ownership responsibility, as boundary maintenance costs can be substantial over time. Look for signs of recent repairs, leaning sections, or rot that might indicate imminent replacement requirements, and clarify with the estate agent which boundaries are the property owner's responsibility.
Examine any shared driveways, pathways, or access routes to ensure you understand maintenance obligations and usage rights. These shared facilities often become sources of neighbor disputes if responsibilities aren't clearly defined before purchase, making thorough investigation essential during your viewing process.
Inside the property room by room inspection
Professional home inspection methodology requires systematic evaluation of each room type, examining flooring and wall condition while looking beyond interior design staging to assess actual functionality and identify commonly overlooked issues. Your room-by-room approach should mirror this systematic methodology, spending adequate time in each space to evaluate both obvious features and subtle indicators of potential problems.
- Living areas: Check flooring, walls, ceiling condition, electrical outlets
- Bedrooms: Test windows, built-in storage, heating, natural light
- Kitchen: Examine appliances, plumbing, ventilation, work surfaces
- Bathrooms: Test water pressure, check for leaks, assess ventilation
- Utility spaces: Inspect boiler, electrical panel, storage options
Begin each room assessment by examining flooring condition, looking for wear patterns, damage, or unevenness that might indicate structural issues beneath. Professional inspectors note that flooring problems often reveal underlying issues with subfloors, moisture, or structural movement that require investigation beyond surface-level repair.
Wall and ceiling inspection should focus on cracks, stains, or repairs that might indicate structural movement, plumbing leaks, or roof problems. Pay particular attention to corners where different structural elements meet, as these areas often show the first signs of settlement or movement issues.
Testing all systems and utilities
Step-by-step utility testing procedures ensure all electrical, plumbing, and heating systems function adequately and identify potential problems that could result in significant repair costs after purchase. Professional assessment techniques focus on functionality testing rather than detailed technical evaluation, but systematic testing reveals most common utility problems that affect daily living.
- Turn on all taps to test water pressure and temperature
- Check electrical outlets with a phone charger or tester
- Test light switches and examine fuse box condition
- Run heating system and check radiator function
- Flush all toilets and check for proper drainage
- Test boiler controls and examine service records
- Check for adequate electrical capacity for modern needs
Water pressure testing should include both hot and cold water at multiple outlets, as pressure variations might indicate plumbing problems or inadequate system capacity. Low water pressure can result from pipe corrosion, system design issues, or supply problems that require professional assessment and potentially expensive remediation.
Electrical system evaluation focuses on outlet functionality and fuse box condition, looking for modern safety features and adequate capacity for contemporary electrical demands. Properties with old-style fuse boxes or limited electrical capacity may require rewiring costing £3,000-£8,000, making electrical assessment crucial during your viewing.
Boiler and heating system testing should include checking controls, examining service records, and assessing radiator heating efficiency throughout the property. Central heating system replacement typically costs £3,000-£6,000, while boiler replacement alone ranges from £1,500-£4,000 depending on system type and property size.
For deeper inspection consider our house survey checklist to identify issues beyond what viewings reveal.
Storage space assessment
Professional methodology for evaluating storage adequacy involves systematic cupboard and closet assessment combined with calculation techniques based on household size and lifestyle requirements. Storage evaluation connects practical organization needs with interior design functionality, ensuring the property meets your long-term living requirements rather than just current staging presentation.
- Built-in wardrobes: depth, hanging space, shelf capacity
- Kitchen cupboards: accessibility, condition, organization potential
- Loft space: access, flooring, height, insulation
- Under-stairs storage: accessibility, moisture levels, size
- Garage/outbuildings: security, weatherproofing, electrical supply
- Basement/cellar: damp-proofing, ventilation, access
Calculate storage requirements based on your household size and possessions, considering both current needs and future expansion. Professional organizers recommend minimum storage space equivalent to 10% of living space for most households, though this varies significantly based on lifestyle and possessions.
Examine storage condition carefully, looking for signs of dampness, pest problems, or structural issues that might limit usability. Loft spaces require particular attention to insulation quality, structural integrity, and safe access, as these factors affect both storage potential and energy efficiency throughout the property.
Looking beyond staging and decoration
Professional techniques for evaluating properties beyond home staging presentation require understanding common real estate marketing methods that mask defects or alter space perception. Interior design staging often uses furniture placement, lighting, and decoration to enhance apparent space and hide potential problems, making objective assessment challenging without systematic evaluation techniques.
Common staging techniques include using undersized furniture to make rooms appear larger, strategic lighting to hide defects, and fresh paint or wallpaper to cover stains or damage. Professional property assessors recommend mentally removing all furniture and decoration to assess actual room dimensions and structural condition.
Focus on permanent fixtures and structural elements rather than decorative features, examining walls, flooring, and ceilings for their actual condition rather than their styled appearance. This approach reveals the property's true condition and helps you make decisions based on structural integrity rather than aesthetic presentation.
The neighborhood and surroundings
Comprehensive neighborhood assessment methodology covers community evaluation, local area amenities, public transportation access, and school district quality through systematic evaluation at different times and days. Neighborhood characteristics significantly impact both property value and quality of life, making thorough location assessment essential for long-term satisfaction with your purchase.
- Morning: School run traffic, commuter patterns, public transport frequency
- Afternoon: Local amenities accessibility, parking availability, community activity
- Evening: Street lighting, security, noise levels, social atmosphere
- Weekend: Neighborhood character, local facilities usage, parking pressure
- Different seasons: Flooding risk, heating costs, garden maintenance needs
Explore detailed viewing strategies such as bringing a friend for fresh insights and wandering the local area to assess amenities and walkability.
Research future development plans that might affect the neighborhood character or property value, including planned infrastructure projects, new housing developments, or commercial construction. Local council planning departments provide this information, and major developments can significantly impact noise levels, traffic patterns, and community atmosphere.
Evaluate local amenities systematically, considering walking distances to shops, schools, healthcare facilities, and recreational areas. Public transportation accessibility affects both daily convenience and property resale value, making thorough assessment of bus routes, train stations, and service frequency important for most buyers.
Checking noise levels and potential disturbances
Professional techniques for assessing noise pollution and detecting various disturbance types require systematic evaluation at different times to identify all potential acoustic environment issues. Traffic impact and other noise sources vary significantly throughout the day and week, making single-time assessments inadequate for understanding true noise levels.
- Stand in each room for 5 minutes listening for traffic noise
- Check proximity to flight paths, railways, or industrial areas
- Listen for neighbor noise through walls and floors
- Identify potential future noise sources (planned developments)
- Test noise levels with windows open and closed
- Consider seasonal variations (air conditioning, garden activities)
Traffic noise assessment should include peak commuting hours, weekend activity, and late evening periods to understand the full range of transportation-related disturbances. Properties near major roads may experience noise levels that significantly impact sleep quality and daily comfort, particularly in bedrooms facing busy streets.
Industrial or commercial noise sources require investigation of operating hours, future expansion plans, and regulatory restrictions that might affect noise levels. Some industrial activities operate only during business hours, while others run continuously or during night shifts, creating different noise patterns that affect residential suitability.
Questions to ask during your second viewing
Strategic questioning framework for extracting essential information from real estate agents during the property sale process should be organized by category with each question serving a specific strategic purpose. Understanding what answers reveal about your home buying decision helps you gather comprehensive information while identifying potential evasiveness requiring disclosure verification.
- Property history: Previous owners, length of ownership, reason for selling
- Maintenance: Recent repairs, ongoing issues, service records
- Neighborhood: Local developments, community issues, future plans
- Utilities: Average bills, system ages, recent upgrades
- Legal matters: Planning permissions, building regulations, disputes
- Market conditions: Previous offers, time on market, price changes
Prepare your questions in advance and take notes during the viewing to ensure you gather all necessary information systematically. Estate agents are legally required to provide accurate information about known issues, but the quality and completeness of information often depends on asking specific, well-informed questions.
Document all responses carefully and follow up on any concerning answers with independent research or professional advice. Inconsistent answers or reluctance to provide specific information about maintenance, problems, or property history should trigger additional investigation before proceeding with your purchase.
Understanding property history and maintenance
Professional approach to investigating building maintenance records and property history through strategic questioning reveals patterns that indicate future problems and expenses. Maintenance history provides insight into the property's condition and the current owners' care standards, helping predict ongoing maintenance requirements and potential hidden issues.
- When was the roof last replaced or repaired?
- What heating system maintenance has been done recently?
- Are there any ongoing or recurring issues?
- Can you provide service records for major appliances?
- What renovations have been completed and when?
- Are there any warranties still valid on recent work?
Request documentation for major maintenance work, including receipts, guarantees, and professional certifications where applicable. Well-maintained properties typically have comprehensive records of work completed, while absence of documentation might indicate deferred maintenance or amateur repairs that could cause future problems.
Ask specifically about recurring issues or problems that required multiple repair attempts, as these often indicate underlying structural or system problems that haven't been properly resolved. Persistent dampness, recurring electrical problems, or repeated plumbing issues suggest fundamental problems requiring professional assessment before purchase.
Red flags that shouldn't be ignored
Critical warning signs indicating building defects or structural problems require immediate professional property inspection or home survey to prevent costly mistakes. Specific examples of serious issues, backed by statistics on remediation expenses, emphasize the importance of thorough investigation when red flags appear during your viewing process.
| Red Flag | What It Could Indicate | How to Investigate Further |
|---|---|---|
| Musty odors | Hidden damp or mold issues | Check behind furniture, examine walls with moisture meter |
| Fresh paint in isolated areas | Covering structural problems | Look for texture differences, ask about recent repairs |
| Uneven floors | Foundation settlement or structural issues | Use spirit level, check for cracks in walls |
| Water stains on ceilings | Roof leaks or plumbing problems | Examine roof space, check upstairs plumbing |
| Excessive furniture blocking walls | Hiding structural defects | Ask to move furniture, examine all wall surfaces |
Professional building inspectors report that over 40% of serious structural problems are initially masked by staging, decoration, or strategic furniture placement. Red flags often appear as subtle indicators rather than obvious defects, requiring systematic attention to details that casual viewing might miss.
The cost of ignoring red flags can be substantial, with major structural repairs averaging £10,000-£50,000 depending on the problem severity and property size. Dampness remediation typically costs £1,000-£5,000, while foundation problems can exceed £20,000, making careful red flag identification crucial for protecting your investment.
Signs of damp and water damage
Detailed identification guide for different structural damp types, including rising damp and condensation, plus water damage and mold indicators helps identify subtle signs of concealed building defects. Health implications and remediation costs for various damp problems make early identification essential for both safety and financial protection.
- Dark patches or staining on walls, especially at floor level
- Peeling wallpaper or paint, particularly in corners
- Musty or earthy odors, especially in basements or ground floors
- White salt deposits on walls (efflorescence)
- Soft or spongy areas when pressing walls
- Condensation on windows that doesn’t clear
- Black spots or patches indicating mold growth
Rising damp appears as horizontal staining typically 1-1.5 meters above floor level, often accompanied by salt deposits and plaster deterioration. This serious structural issue requires professional damp-proofing treatment costing £1,000-£3,000 and can indicate broader foundation problems requiring extensive remediation.
Condensation problems, while less serious than structural dampness, still require attention and can lead to mold growth affecting health and property condition. Poor ventilation, inadequate heating, or lifestyle factors often contribute to condensation issues that need addressing through improved ventilation or heating system upgrades.
Water damage from leaks creates staining patterns that help identify the source, whether from roof leaks, plumbing failures, or penetrating dampness through external walls. Recent water damage might be concealed by fresh decoration, making careful examination of all wall and ceiling surfaces essential during your viewing.
Understand the legal context by reviewing our conveyancing checklist to understand what legal issues matter during purchase.
After the second viewing next steps
Professional guidance on post-viewing decision-making within real estate transaction context requires systematic evaluation frameworks for organizing notes, comparing properties, and determining when additional building inspection or property survey assessments become necessary before proceeding with your purchase.
- Compile and organize all viewing notes immediately
- Compare findings against your original requirements list
- Research any concerns or red flags identified
- Calculate potential additional costs for repairs or improvements
- Decide if professional surveys or inspections are needed
- Discuss findings with your mortgage advisor or solicitor
- Make informed decision on whether to proceed with offer
Create a comprehensive property evaluation document combining your viewing notes, photographs, and research findings to support your decision-making process. This systematic approach helps you compare multiple properties objectively and provides documentation for future reference during negotiations or survey discussions.
Calculate potential additional costs for any issues identified during your viewing, including both immediate repairs and longer-term maintenance requirements. Professional cost estimates for major work help you understand the true investment required and inform your offer price accordingly.
Continue the purchase process by following our moving house process guide to understand next steps after viewing.
When to arrange a professional survey
Professional standards for determining when building surveys become necessary include guidance on selecting appropriate survey types based on property age, condition, and specific concerns identified during your viewing. Structural engineer consultation or specialized home inspector assessment provides detailed evaluation beyond what personal viewing can achieve.
| Survey Type | When Needed | What It Covers |
|---|---|---|
| Homebuyer Report | Most standard properties | Condition overview, urgent defects, legal issues |
| Building Survey | Older or unusual properties | Comprehensive structural assessment, detailed defects |
| Structural Engineer | Serious structural concerns | Specific structural problems, repair solutions |
| Specialist Survey | Specific issues identified | Damp, electrical, drainage, or other focused areas |
Statistics indicate that professional surveys identify significant issues in approximately 25% of properties that weren't apparent during standard viewings. These discoveries often lead to price negotiations averaging 5-10% of the property value, making survey costs typically worthwhile investments in purchase protection.
Consider professional surveys essential for properties over 50 years old, unusual construction types, or when you've identified specific concerns during your viewing. The survey cost, typically £400-£1,200 depending on type and property size, represents minimal expense compared to potential repair costs for undiscovered problems.
For new builds additional checks apply so reference our new build snagging checklist pdf for property-specific inspection points.
Second viewing success stories
Real-world case studies demonstrate how thorough second viewings benefit buyers through early identification of critical issues and informed decision-making. Home buying examples where detailed inspections revealed problems include statistics on decision changes and price renegotiations resulting from comprehensive property investment assessments.
One recent example involved buyers who discovered significant structural movement during their second viewing that hadn't been apparent during their initial visit. The detailed inspection revealed foundation settling that required £15,000 in remediation work, leading to successful price negotiations that saved them more than the repair costs while ensuring proper structural repairs before purchase.
Another success story demonstrates how systematic utility testing during a second viewing revealed a failing heating system that would have required complete replacement within months of purchase. The buyers used this information to negotiate a £4,000 price reduction and arranged for heating system replacement before moving in, avoiding winter heating failures and emergency repair costs.
Statistical analysis of second viewing outcomes shows that 35% of buyers modify their offers based on second viewing discoveries, with average price reductions of £8,000 when significant issues are identified. These negotiations protect buyers from unexpected costs while ensuring sellers address known problems appropriately.
Downloadable second viewing checklist
This comprehensive checklist reflects home inspection industry best practices and professional surveyor experience, providing a systematic tool for thorough property assessment during your viewing appointment. The digital download format allows convenient printing and note-taking during actual property visits, ensuring you don't overlook critical evaluation areas.
The checklist organizes inspection points by location and system type, following the same methodology used by professional building inspectors to ensure comprehensive coverage of all property elements. Each section includes specific items to examine, warning signs to identify, and spaces for recording observations that support your decision-making process.
Professional experience demonstrates that systematic checklists improve viewing effectiveness by 60% compared to unstructured assessments, helping buyers identify issues that might otherwise be overlooked during the time pressure and emotional intensity of property viewing appointments.
How to handle uncertainty after your second viewing
Professional decision-making frameworks for managing post-viewing doubts require objective evaluation methodology that weighs property investment priorities against emotional reactions. Understanding when uncertainty indicates legitimate concerns versus normal buyer anxiety helps you make informed decisions about proceeding with your purchase.
- DO: List specific concerns and research solutions
- DO: Seek professional advice for technical issues
- DO: Compare with other viewed properties objectively
- DON’T: Rush decisions due to market pressure
- DON’T: Ignore gut feelings about major concerns
- DON’T: Let minor cosmetic issues overshadow structural soundness
Create a systematic evaluation framework that separates factual concerns from emotional reactions, helping you distinguish between problems requiring professional assessment and minor issues that can be easily resolved after purchase. This objective approach reduces decision anxiety while ensuring you don't overlook legitimate concerns that could affect your long-term satisfaction.
Consider seeking professional advice when uncertainty relates to structural, electrical, or plumbing concerns that could indicate expensive problems. Estate agents, surveyors, and specialist contractors can provide expert opinions that help resolve technical uncertainties and support informed decision-making about whether to proceed with your purchase.
Remember that some uncertainty is normal during property purchases, as buying a home represents a significant financial and emotional commitment. Focus on addressing specific concerns systematically rather than allowing general anxiety to prevent proceeding with an otherwise suitable property that meets your requirements and budget constraints.
Frequently Asked Questions
During a second property viewing, focus on detailed inspections like checking for structural integrity, plumbing functionality, and electrical systems. Pay attention to signs of wear, such as cracks in walls or uneven flooring, and assess the overall condition of appliances and fixtures. Taking notes and photos can help you remember key details for decision-making later.
The first viewing is often about getting an initial impression and checking if the property meets basic needs, while a second viewing dives deeper into specifics like potential repairs and functionality. In the second visit, you can bring tools or professionals to test systems and identify hidden issues. This stage helps confirm your interest and gather information for negotiations.
Watch for red flags such as unusual odors indicating mold or pests, water stains on ceilings suggesting leaks, and uneven floors that might point to foundation problems. Check for outdated electrical wiring or plumbing issues by testing outlets and faucets. Also, note any signs of poor maintenance, like peeling paint or cracked tiles, which could signal larger concerns.
A second property viewing typically takes 30 to 60 minutes, allowing ample time for a thorough inspection without rushing. Larger properties or those with many features might require up to 90 minutes, especially if you’re checking systems in detail. Plan extra time if bringing a professional for assessments.
During a second viewing, document any defects like needed repairs or outdated features to use as leverage in price negotiations. Discuss these issues with the seller or agent, potentially requesting credits or reductions based on estimated costs. A professional inspection report from the viewing can provide solid evidence to support your lower offer.
Ask about the property’s maintenance history, including recent repairs and utility costs, to gauge ongoing expenses. Inquire about neighborhood details like noise levels, schools, and future developments. Also, question the seller’s reason for moving and any known issues to uncover potential hidden problems.
To check for structural issues, inspect walls and ceilings for cracks, test doors and windows for proper alignment, and walk the floors to feel for unevenness. Examine the foundation and basement for water damage or shifting signs. If unsure, consider hiring a structural engineer during the viewing for expert evaluation.